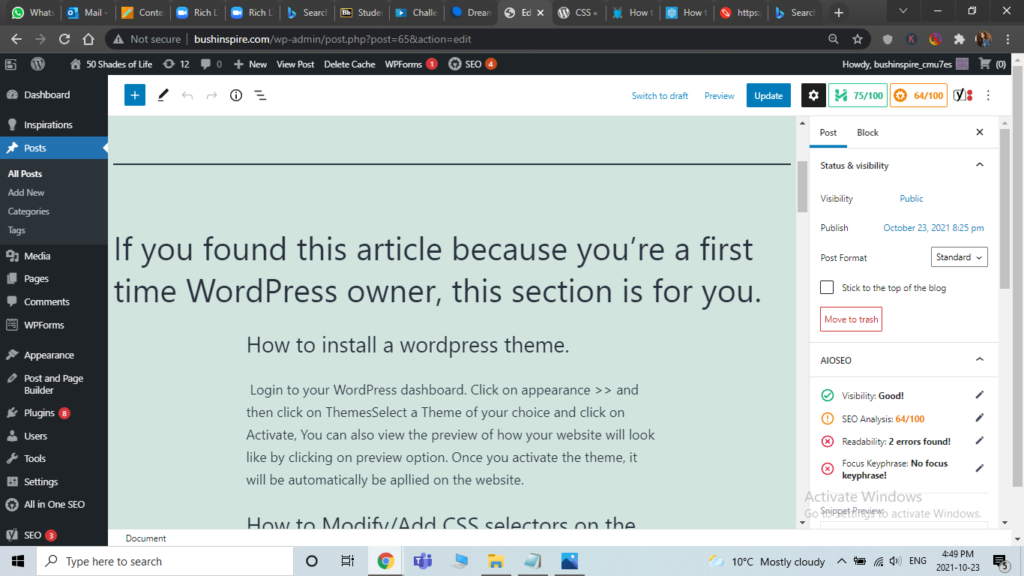
If you found this article because you’re a first-time WordPress owner, this section is for you.
How to install a wordpress theme.
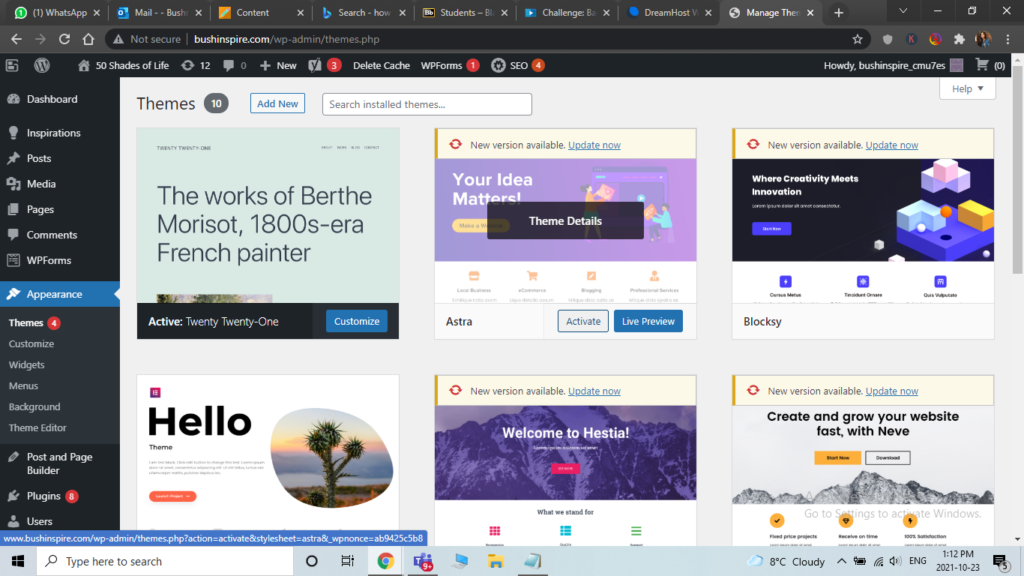
- Login to your WordPress dashboard. Click on Appearence >> Click on Themes. Select a Theme of your choice and Click on Activate.
How to Modify/Add CSS selectors on the theme:
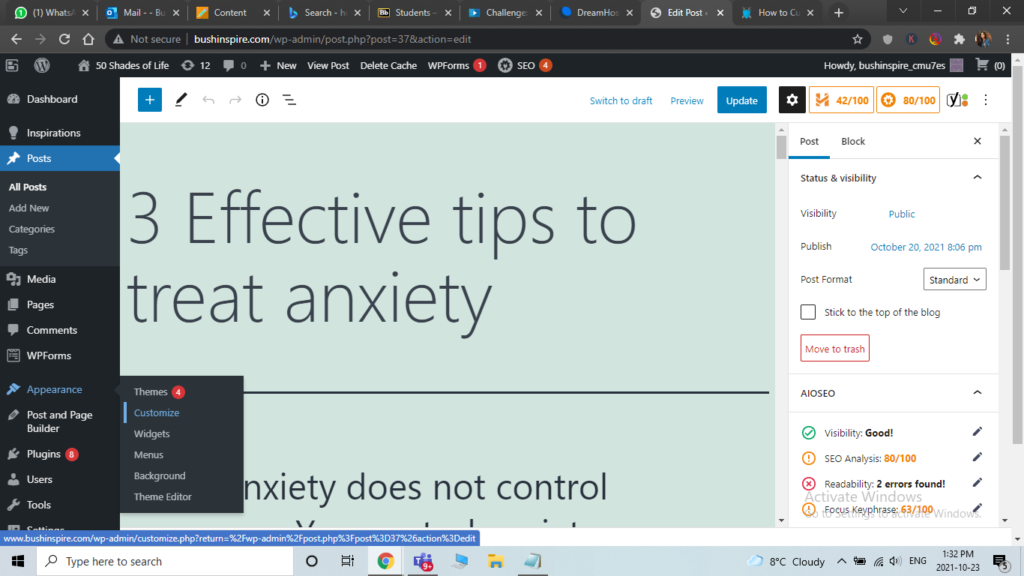
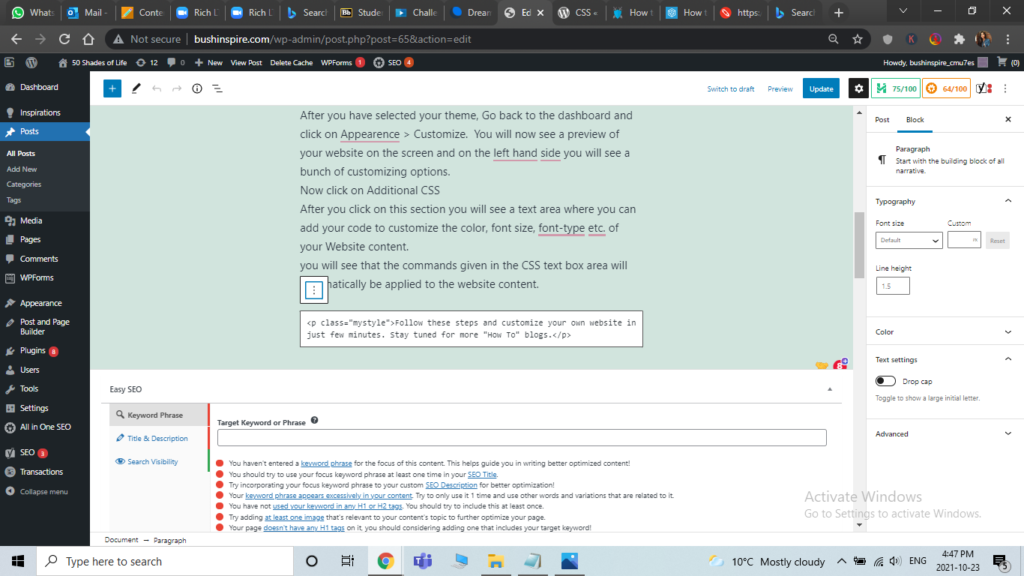
- After you have selected your theme, Go back to the dashboard and click on Appearence > Customize
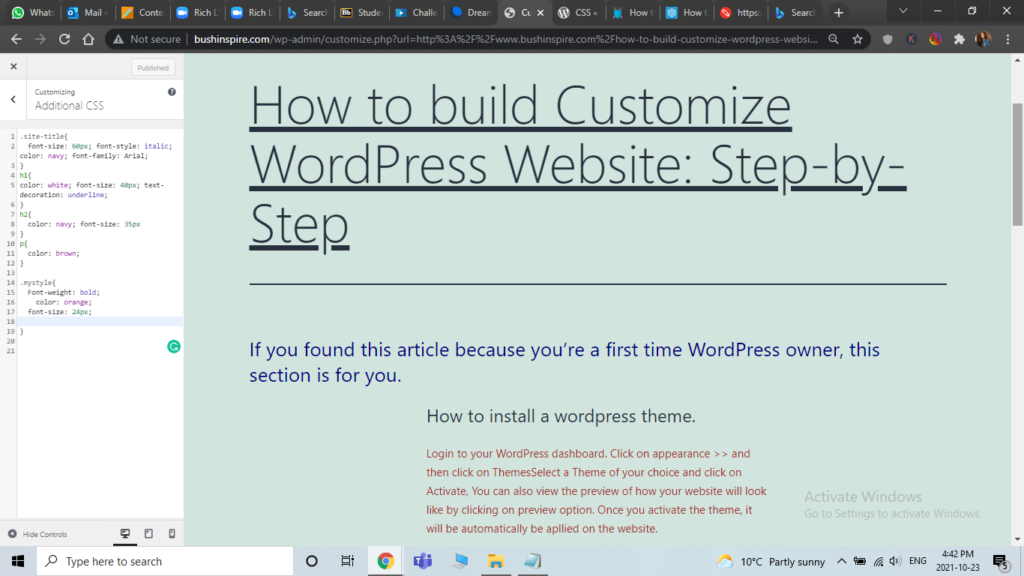
- You will now see a preview of your website on the screen and on the left hand side you will see a bunch of customizing options. Now click on Additional CSS

- After you click on this section you will see a text area where you can add your code to customize the color, font size, font-type etc. of your Website content.
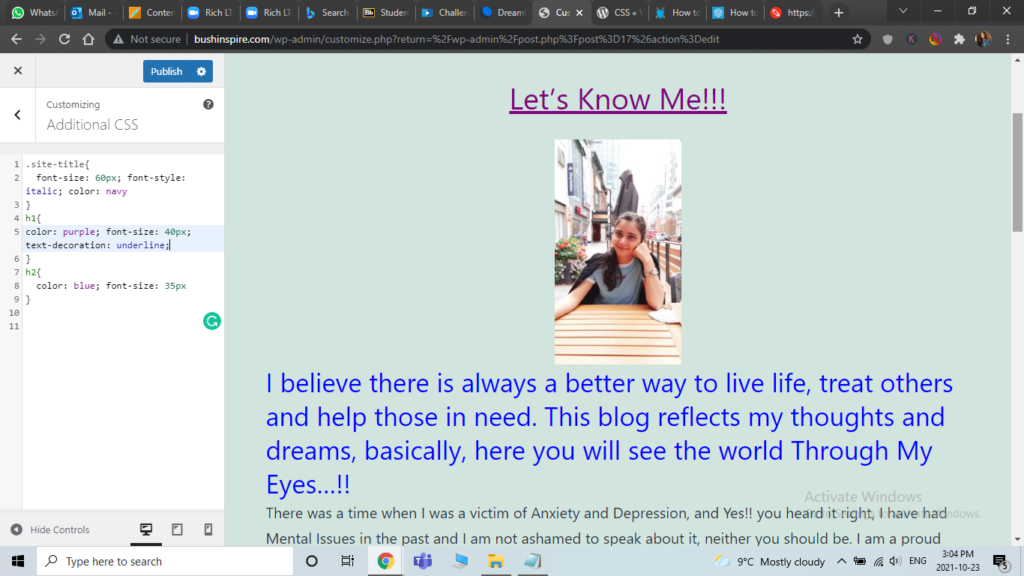
- You will see that the commands given in the CSS text box area will automatically be applied to the website content.
How to use HTML tags to define blog posts:
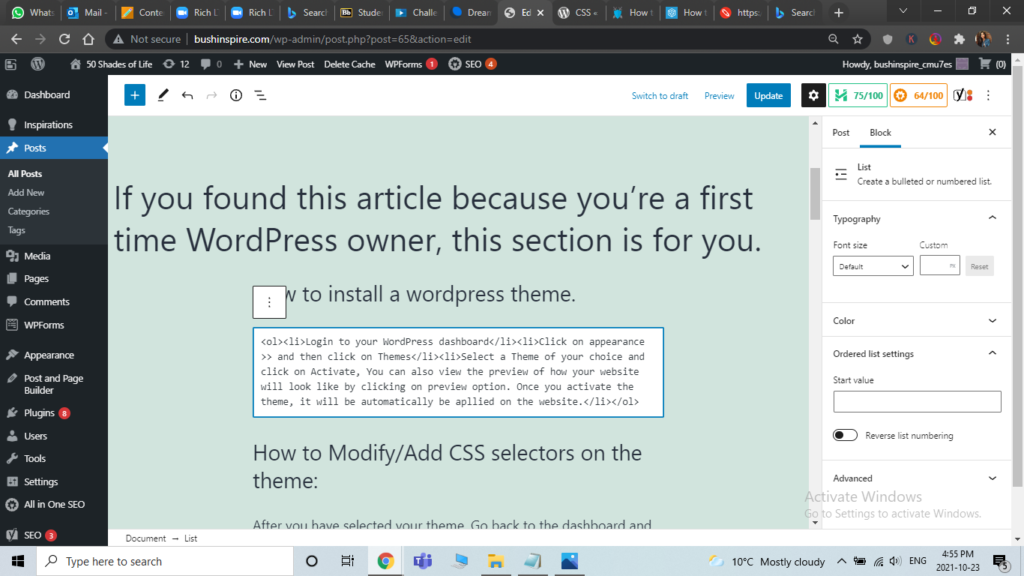
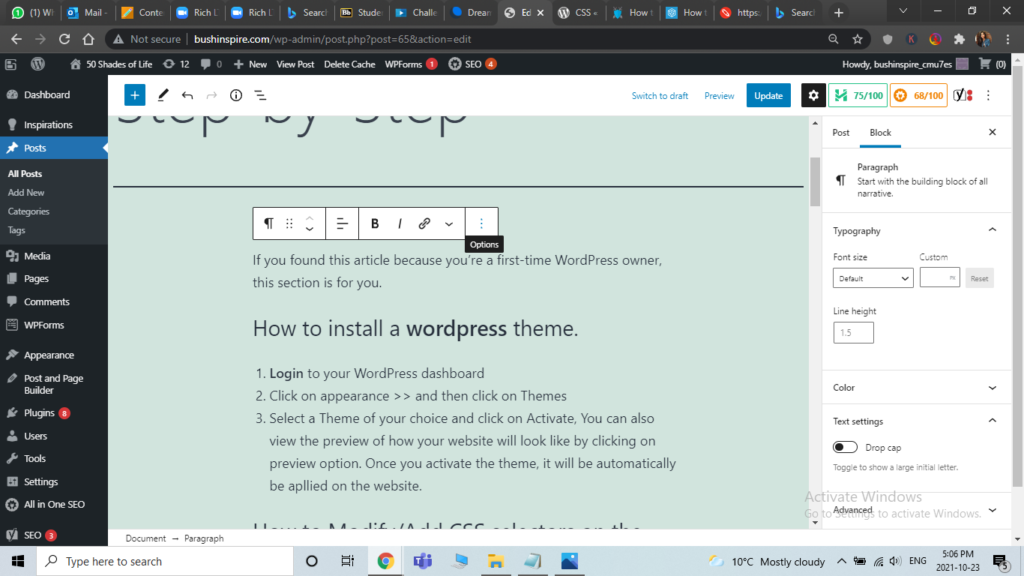
- Create an ordered or unordered list on your blog post: Select a block and click on more options >> Select “Edit in HTML” and add codes. (Before- After images)
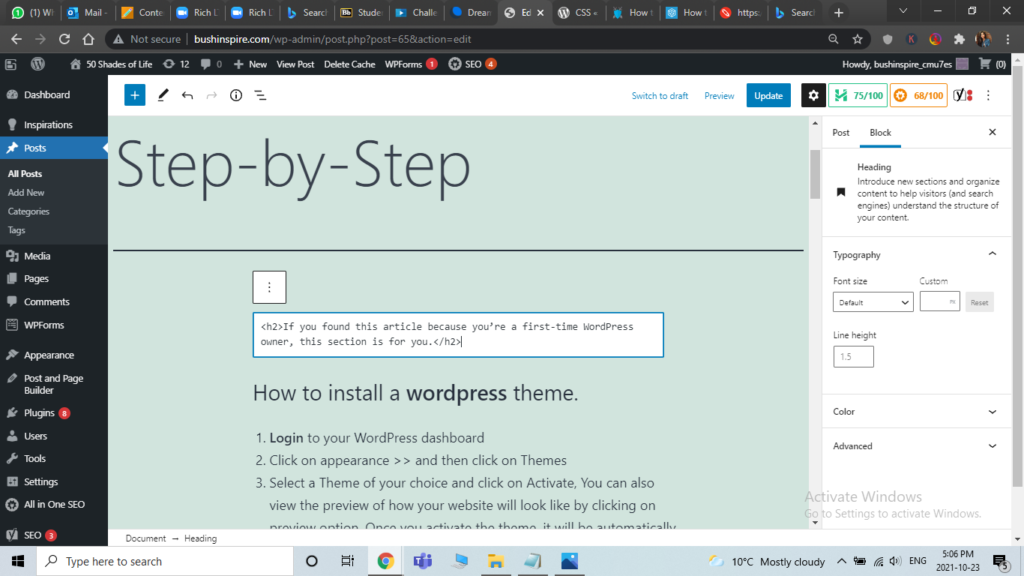
- Define content with H1, H2 and H3 tags (Before- After images)
- Define a new class that affects colour, typeface and font size and name this class .mystyle in adtional CSS text box >> add code – “”.mystyle{Font-weight: bold; color: orange; font-size: 24px;”
- Publish post >> Go to edit post >> Select Block >> Click on more options >> Click on Edit in HTML >> add code class=”mystyle” and click PUBLISH.
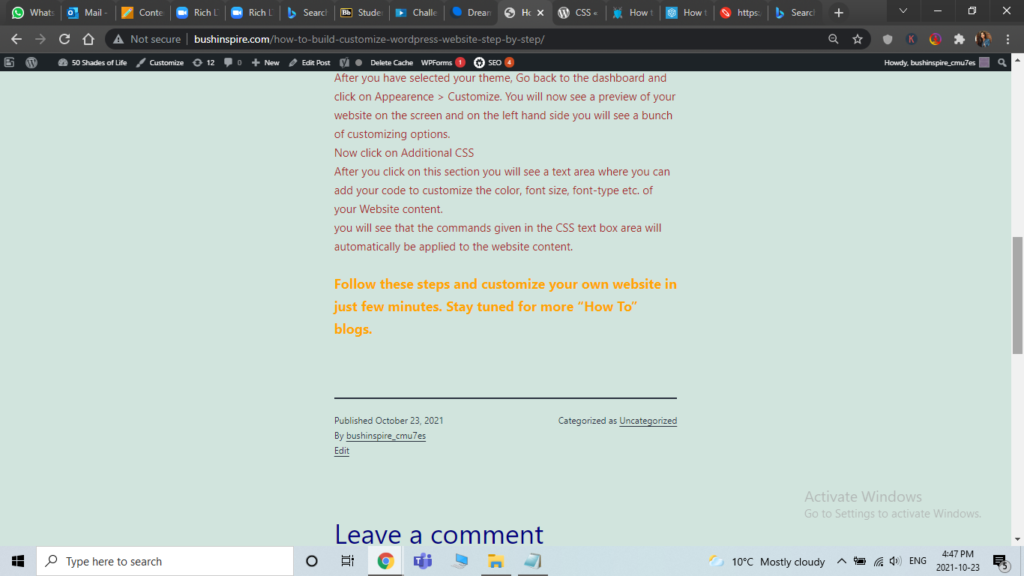
Follow these steps and customize your own website in just a few minutes. Stay tuned for more “How To” blogs.